The organizer had planned for a fun activity during the party; decorating onesies. She had iron on fabric and stencils, along with fabric pens, plenty of plain onesies, and an iron - hot and ready to go. We made some cute little outfits for the mommy-to-be to take home.
I signed up to make desserts, and wanted to bring something that would coordinate....onesie cookies.
The new baby is named, Lucy, and we had a, "We Love Lucy" theme, with red and white....so I iced the cookies to match.

These days, you can get cookie cutters in about every shape imaginable. What you dont find in the stores, you can order online.... perfect for any celebration.
Years ago I tried different recipes, trying to find the best for cookie cutters. I found one that is fantastic, the dough doesnt spread AT ALL...making it ideal for even the most detailed designs.
I wish I could give credit to the source, but I just have this scribbled onto a card in my recipe box...but I owe a lot of "thanks" to the person that posted this;
6 cups flour
3 tsp. baking powder
2 cups butter
2 cups sugar
2 eggs
2 tsp. vanilla extract or desired flavoring (I like almond myself)
1 tsp. salt
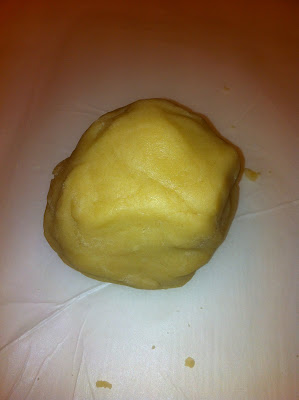
Cream butter and sugar until light and fluffy. Add eggs and vanilla. Mix well. Mix dry ingredients and add a little at a time to butter mixture. Mix until flour is completely incorporated and the dough comes together.
You should have a ball that looks like this:

Roll to desired thickness and cut into desired shapes. Bake on ungreased baking sheet at 350 degrees for 8 to 10 minutes or until just beginning to turn brown around the edges. This recipe can make up to 5 dozen, 3" cookies.
It is best to cut out the designs after the dough has been refrigerated.
One trick that I have found, is to put some of the dough between two pieces of parchment paper, BEFORE REFRIGERATING and roll it out to the desired thickness.

It's much easier to roll when it is soft, and also it wont stick when it is between the paper. Then, after it is flat, you can refrigerate it.
After the dough has chilled, take it out.....

Use your cutter to start making shapes......

They dont take long to bake, so you will want to keep an eye out for them, and pull them out just when the edges start to brown.

Once the cookies have completely cooled, you can ice them. I use royal icing, as it hardens up nicely. I make 2 batches per color; one a little bit thicker for tracing around the edges....

and a second batch that is just a tiny bit thinner, for filling in the cookie.....

The easiest, and neatest way to frost them, is using plastic bottles. I bought a bunch of them at the craft store, and get a lot of use out of them. During the holidays you can fill them with different colors of frosting and let the kids decorate cookies....
I prefer the smaller bottles, as you can make fine details nicely.

Once the icing has been filled in, you can add embellishments. I used candy pearls to accent the red cookies, and red hots as buttons on the white.

When the icing is completely dry, you can use the thicker frosting to add additional accents, as I did here with the arm sleeves and leg holes.

These cookies make great party favors and gift accents too....and because the royal icing hardens, they wont smudge in plastic treat bags.

I hope this inspires you to make these cookies for your next party!

I love this idea to make adorable little baby onesies cookies. What a nice idea that you made onesies for the new baby too. That's really sweet. Having a baby is such a special milestone. Thanks for sharing this recipe!
ReplyDeletei like your idea to roll out before placing in the fridge. :)
ReplyDeleteI am super impressed!
ReplyDelete